Introduction
Pipelines are one of the "big things", and with good reason. They can significantly speed up the deployment process when you have updates to your website/code. This is a simple pipeline using Amazon AWS and Git, but it doesn't have to deploy to AWS instances, it can deploy to on-premise servers too, or servers from other providers. This example will create a simple webserver hosting an page over HTTP.
There are several elements that you need to put together to get this working end-to-end, but nothing too complex when you break it up.
- A Git repository, which will host your application
- Your application code (basically your website and a few other bits)
- A couple of AWS IAM Roles
- An instance (or two. T2.micro free-tier is fine)
- Your Application, created in CodeDeploy
- Your CodePipeline which we will create below.
Git
First, you need a Git Repository. Actually, you don't, you can do this using S3 as a source, but I will use Github for this as it is fairly easy to use, and if you are interested in code pipelines you probably already have one. If not, it is free, so so just sign-up for an account. You then need a repository. So create a new repository and call it whatever you like.
In this repository, you need a few key files.
appspec.yml
This is the file that will tell AWS CodeDeploy all about your application. It will have some hooks to install your actual webserver software (so you can deploy to a new instance), and details of what files need to be copied as part of the deployment (in our case, index.html):
        version: 1.0
        os: linux
        files:
        - source: /index.html
            destination: /var/www/html/
        hooks:
        BeforeInstall:
            - location: install_webserver
            timeout: 300
            runas: root
            - location: start_app
            timeout: 300
            runas: root
        ApplicationStop:
            - location: stop_app
            timeout: 300
            runas: root
As you can see, this is going to be really simple. We are going to run a script at deployment time to install our webserver and start it, then we will copy an index.html from this repository to the deployment servers. We will do that as root, and the destination servers are Linux servers. You can create this and save it as a .yml file either through the browser or locally and then upload.
Index.html
This is the page that you will host on your webserver. Go nuts.
<h1>Hello World!</h1>
install_webserver
The meat of the deployment.
        #!/bin/bash
        yum install -y httpd
Not a lot to it, it will just install Apache for us. Create this as a file, similar to our .yml file earlier.
start_app
        #!/bin/bash
        service httpd start
Not much to this one either, but it starts our service. You can probably work out the last one.
stop_app
        #!/bin/bash
        service httpd start
So we now have the files in our repository on Git, we are almost ready to connect to this with AWS. Before that though, create a couple of AWS roles.
IAM Roles
We need a role for the AWS instances to use so get our app from S3 (you will see later), and we also need a 2nd role for CodeDeploy to write to S3.
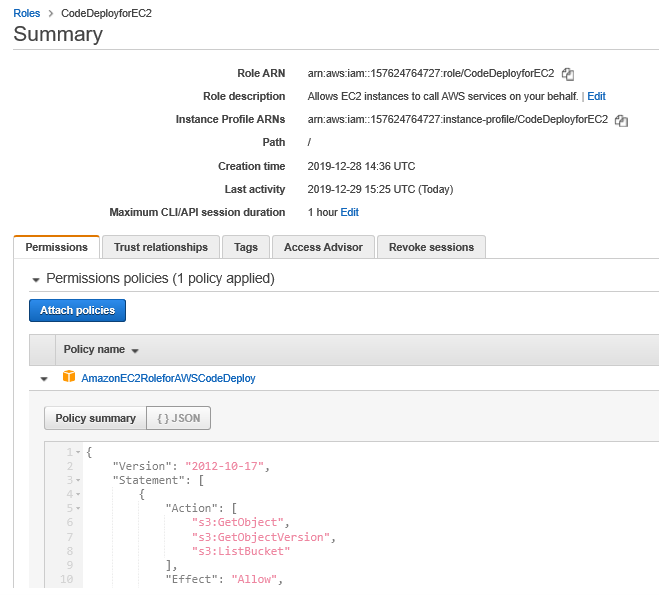
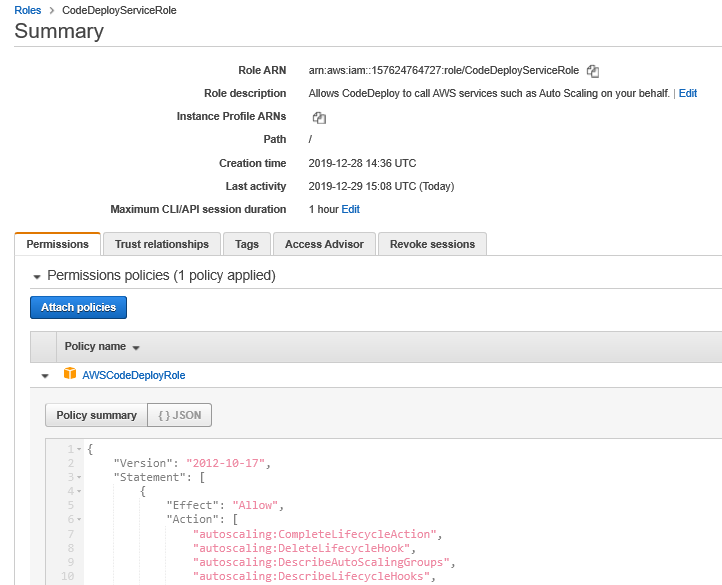
Create the roles and remember the names, we will use them later.
Create the EC2 Instances
At this point though, we should create an instance or two to host our Application.
So switch over to to your AWS Console, go to EC2, and launch an Amazon Linux 2 AMI volume (top of the list typically). Remember to set three things:
1) Set the IAM Role to the role we just created for EC2
2) Add some userdata
3) Tag them/it. Remember the Key/Value pair because we will use it later on.
The userdata we need to add, will be used to install the CodeDeploy agent. You will need to add the following:
    #!/bin/bash
    yum update -y
    yum install ruby -y
    yum install wget -y
    cd /home/ec2-user/
    wget http://aws-codedeploy-us-east-1.s3.us-east-1.amazonaws.com/latest/install
    chmod +x ./install
    ./install auto
Feel free to change the region as appropriate if required.
Remember also to set the Security Group to one that can be accessed from the Internet by HTTP.
Create the Application
So now we need to go to CodeDeploy, and then click on "Applications", then press "Create Application".

Enter an application name ("MyApp" or whatever), choose EC2 as your compute platform and press "Create Application".
Then press "Create Deployment Group".
Create the Deployment Group
Enter the Deployment group name "MyDeploymentGroup" or similar, then choose the role that we created earlier. It should be in the dropdown list.
Leave the deployment type as "In-place".
In "Environment configuration", there are a few options here. The easiest is actually to tick the box for "Amazon EC2 instances". This works by AWS automatically using instances that we tag with the tag we define here. So enter the tag details we created earlier. Leave the rest pretty much default, but you might want to uncheck the "Load Balancer" option (unless you want to use one of course), and then click "Create Deployment Group".
Create the Pipeline
We are then ready to create the Pipeline. So open the Pipeline menu on the left and choose "New Pipeline".
Again, most of this is fairly straight-forward. Give the Pipeline a name ("MyPipeline" or similar), and enter a role name. You can leave the rest set by default, and this will then create an S3 bucket for your files. Once you press Next, you will able to select your source. We are almost there!
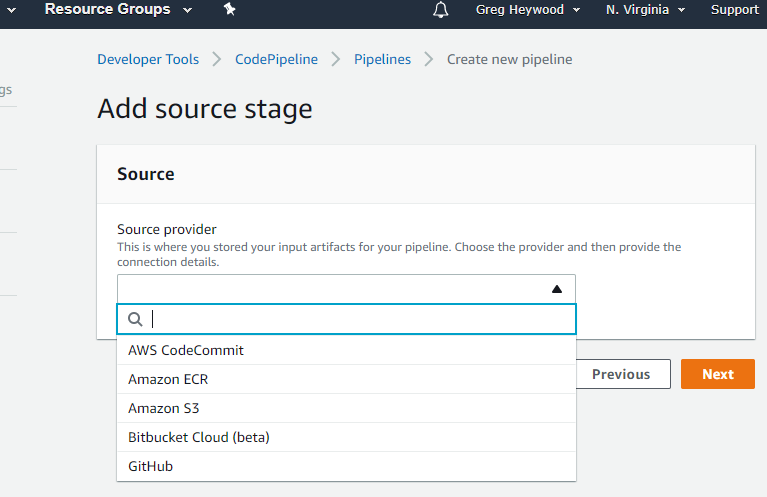
For the source, select GitHub. Enter your Github credentials, and you can then select the repository we created earlier, and the branch (probably master in this case).
We want to use Github Webhooks for detecting changes. Press Next, then press "Skip Build Stage".
When prompted for the "Deploy provider", select "AWS CodeDeploy", and enter the names for the Application that we have already created, and the Deployment group we created. Then press "Create Pipeline".
You can then see your Pipeline!
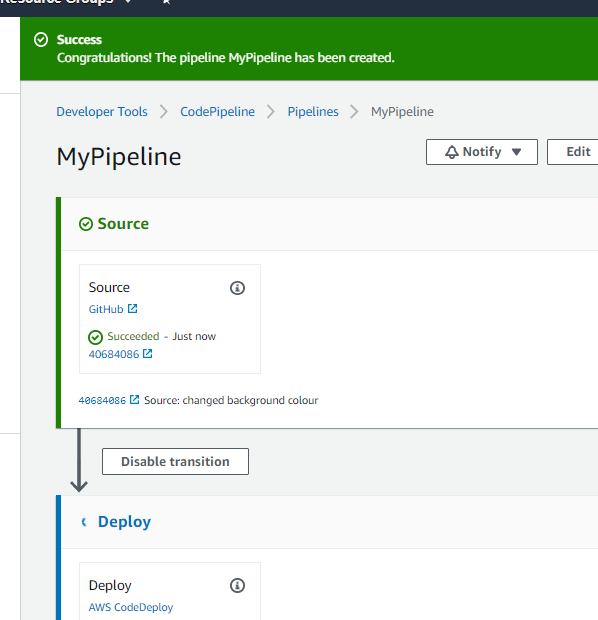
Deploy Your Application
Actually, this should happen automatically at this point. Your AWS Pipeline will pull the content from Github, and deploy to your instances that are tagged. If all goes well, you will then be able to access the your instance(s) via their public IP address and see the contents of the .HTML file that we put in Github.

You can then edit your source in Github, and AWS will automatically detect the change and updates your instances. Give it a try!
Troubleshooting
This link has some information on troubleshooting deployments, but like with anything, you can start from the bottom. Make sure you instances have the CodeDeploy agent, and work up from there.
There is also a guide on CodeDeploy from AWS here
comments powered by Disqus